Understanding Extruder Calibration for Tevo Tarantula
Extruder calibration is a critical step in achieving high-quality 3D prints with your Tevo Tarantula. It involves accurately controlling the amount of filament that is fed into the hot end. When the extruder is correctly calibrated, your printer will deposit the exact amount of plastic needed, layer by layer, ensuring dimensional accuracy, good layer adhesion, and overall print quality. Without proper calibration, you’ll likely encounter problems such as under-extrusion (gaps in your prints), over-extrusion (blobs and imperfections), or inconsistent layer lines. This guide will walk you through the entire process, helping you master this essential skill and unlock the full potential of your Tevo Tarantula.
Why Extruder Calibration Is Crucial
The primary reason for calibrating your extruder is to ensure precise filament control. Your 3D printer’s firmware uses ‘E-steps’ (steps per millimeter) to determine how much the extruder motor should turn to push a specific amount of filament. If the E-steps value is incorrect, the printer will either feed too much or too little filament, leading to various printing problems. Accurate calibration ensures that the filament flow matches the model’s requirements, resulting in stronger, more detailed, and aesthetically pleasing prints. Proper calibration also optimizes material usage, preventing waste and improving the overall efficiency of your 3D printing projects.
Common Problems Caused by Incorrect Calibration

Incorrect extruder calibration can manifest in several ways, negatively affecting your print quality. One common issue is under-extrusion, where not enough filament is deposited. This results in weak prints, gaps between layers, and a generally poor surface finish. Over-extrusion, on the other hand, occurs when too much filament is pushed through the nozzle. This can lead to blobs, oozing, and a rough surface texture. Other issues include inconsistent layer lines, poor bridging, and difficulties with fine details. By properly calibrating your extruder, you’ll address these problems and create prints that are strong, precise, and visually appealing. This is essential to getting the most out of your Tevo Tarantula 3D printer. The image above shows a overview of the Tevo Tarantula, helping you locate the extruder.
Tools Needed for Calibration
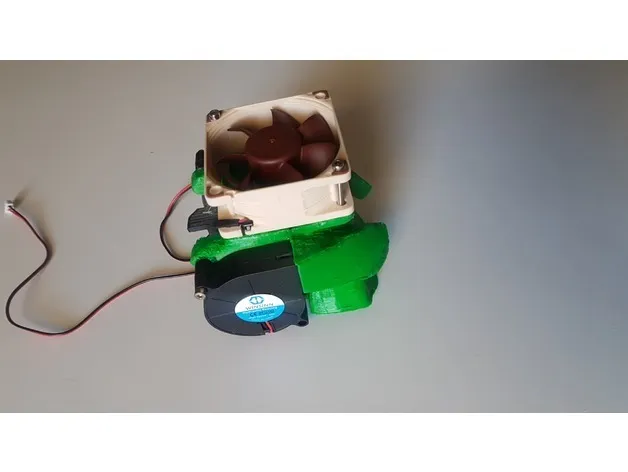
Fortunately, calibrating your Tevo Tarantula’s extruder does not require specialized or expensive tools. The essential tools are readily available and can be found in most homes. Having these items ready before you begin the calibration process will ensure a smooth and efficient workflow. This will make the whole process less tedious. The image below shows how important calibration is. Now, let’s move on to the tools that are required for the calibration process.
Essential Tools for Tevo Tarantula Extruder Calibration
- Digital Caliper: For precise measurements of filament length.
- Ruler or Measuring Tape: Helpful for initial setup and measuring distances.
- Filament: A roll of the filament you intend to use for printing.
- Allen Wrenches: To adjust the extruder and other printer components.
- Computer with USB connection: To connect your printer to your computer and access firmware settings.
- Slicing Software: such as Cura or PrusaSlicer. You’ll need this for generating G-code.
- Note Pad and Pen: For recording measurements and calculations.
Step-by-Step Extruder Calibration Guide

Now that you have the necessary tools, let’s dive into the step-by-step guide for calibrating your Tevo Tarantula’s extruder. Follow these instructions carefully, and you’ll be well on your way to achieving superior print quality. Remember to take your time and double-check your measurements and calculations to ensure accuracy. This is where the real process begins. You’ll need to follow the instructions carefully.
Preparing Your Tevo Tarantula for Calibration
Before starting the calibration process, make sure your Tevo Tarantula is properly set up and ready to go. Ensure that the printer is powered on and connected to your computer. Also, load the filament you plan to use for printing into the extruder. Heat up the hot end to the recommended temperature for your filament type. This will make it easier to feed and measure the filament. Finally, ensure the nozzle is clear of any obstructions. It is important to make sure that your printer is ready to print. Follow these initial steps to ensure the calibration process will run smoothly.
Measuring the Extruder Steps per Millimeter
This step involves determining the current E-steps value. With your printer turned on and heated up, use the control panel or your computer software to command the extruder to advance filament by a specific amount, typically 100mm. You must accurately measure the amount of filament that has been pushed through the extruder. Use the digital caliper to measure 120mm of filament from the entry point of the extruder. Mark a line on the filament at 120mm. Now, instruct the printer to extrude 100mm (or the chosen value) of filament. Measure the remaining filament to determine the exact amount extruded. The image below shows the correct way to measure the filament that comes out of the extruder.
Calculating the E-Steps Value

Next, we’ll calculate the new E-steps value. First, measure how much filament the extruder actually moved. If the printer told the extruder to move 100mm of filament, measure how much filament was left that had not been extruded. Use the following formula: New E-steps = (Current E-steps * 100) / Actual extruded length. For example, if your current E-steps is 93 and the actual extruded length is 90mm, then (93 * 100) / 90 = 103.33. The image below will help you to calculate the new E-steps value.
Adjusting the E-Steps in Your Firmware
Once you’ve calculated the new E-steps value, you’ll need to update your printer’s firmware. Connect your Tevo Tarantula to your computer via USB and open the firmware editing software (e.g., Pronterface or your slicer’s control panel). Navigate to the settings related to extruder E-steps and enter the newly calculated value. Then, save the settings to your printer’s EEPROM or flash the firmware, depending on your printer’s configuration. Now the new E-steps value has been set.
Testing and Refining Your Calibration
After adjusting the E-steps, the final step is to test and refine your calibration. Print a small test object, such as a 20mm calibration cube or a single-layer width test. Carefully inspect the print for any signs of over- or under-extrusion. If the top layers are smooth and consistent, and the dimensions of the object are accurate, your calibration is likely correct. However, if you still see issues, you may need to make further adjustments to the E-steps value. Repeat the process, making small incremental adjustments until you achieve optimal print quality.
Troubleshooting Common Calibration Issues

Even after calibration, you might encounter some printing problems. Here are the solutions to the most common issues. Taking the time to troubleshoot ensures that your prints turn out perfect every time.
Over-Extrusion and Under-Extrusion
If your prints show signs of over-extrusion, like blobs and imperfections, slightly reduce the E-steps value. Conversely, if you observe under-extrusion, with gaps between layers, try increasing the E-steps. Making small adjustments and reprinting test objects will help you find the perfect setting. The image below shows how to fix over and under extrusion.
Dealing with Stringing and Blobs
Stringing and blobs are often caused by retraction settings, not extruder calibration. If you experience these issues, you may need to adjust your retraction settings, such as retraction distance and retraction speed, in your slicing software. Increase the retraction distance and increase the retraction speed, in small increments, until the stringing disappears. Remember that proper calibration helps with this issue.
Improving Print Quality After Calibration

Once you’ve calibrated your extruder, you can further improve your print quality by optimizing other printer settings. This includes things like the print temperature, bed adhesion, and print speed. Experiment with different settings to find the optimal combination for your filament and printer. The following are the tips you should follow to maintain the accuracy of the prints.
Tips for Maintaining Accurate Extrusion
- Regularly check and clean your nozzle to prevent clogs.
- Store your filament in a dry environment to prevent moisture absorption.
- Make sure that the filament is in good condition.
- Use the same filament every time you print, or recalibrate if you change filament types.
- Keep your printer well maintained.
- Perform calibration checks periodically.
Software and Firmware Recommendations
For firmware, Marlin is a popular choice due to its flexibility and extensive community support. As for slicers, Cura and PrusaSlicer are great choices, offering advanced features and ease of use. These software packages provide the tools you need to fine-tune your printer settings and achieve outstanding print quality. In order to make calibration a success, using the right software and firmware is crucial.
Conclusion: By following these steps and investing a little time and effort, you can achieve perfect prints with your Tevo Tarantula. Happy printing!