What is the Tevo Tarantula Bed Carriage
The Tevo Tarantula is a popular DIY 3D printer, and the bed carriage is a crucial component. It’s the moving platform that supports the heated bed, where your 3D prints are built. This carriage moves along the Y-axis, providing the necessary movement for the print head to create three-dimensional objects. Understanding the bed carriage is essential for successful 3D printing with your Tevo Tarantula. It’s the foundation upon which your prints are built, and any issues here can lead to print failures, poor quality, and frustration. This guide is tailored for beginners, providing a comprehensive overview and step-by-step instructions to help you master the bed carriage.
Components of the Bed Carriage
The bed carriage on the Tevo Tarantula is a relatively simple, yet vital, assembly. The main components work in concert to provide stable and accurate movement. Understanding these components will assist you in assembly, calibration, and any necessary repairs. The key parts to familiarize yourself with include the X-axis rail and bearings, the heated bed mounting system, and the Y-axis movement system. Each component contributes to the functionality and precision of your 3D printer, ensuring that your prints adhere properly and accurately to the bed. We will explore each of these crucial aspects further within this guide.
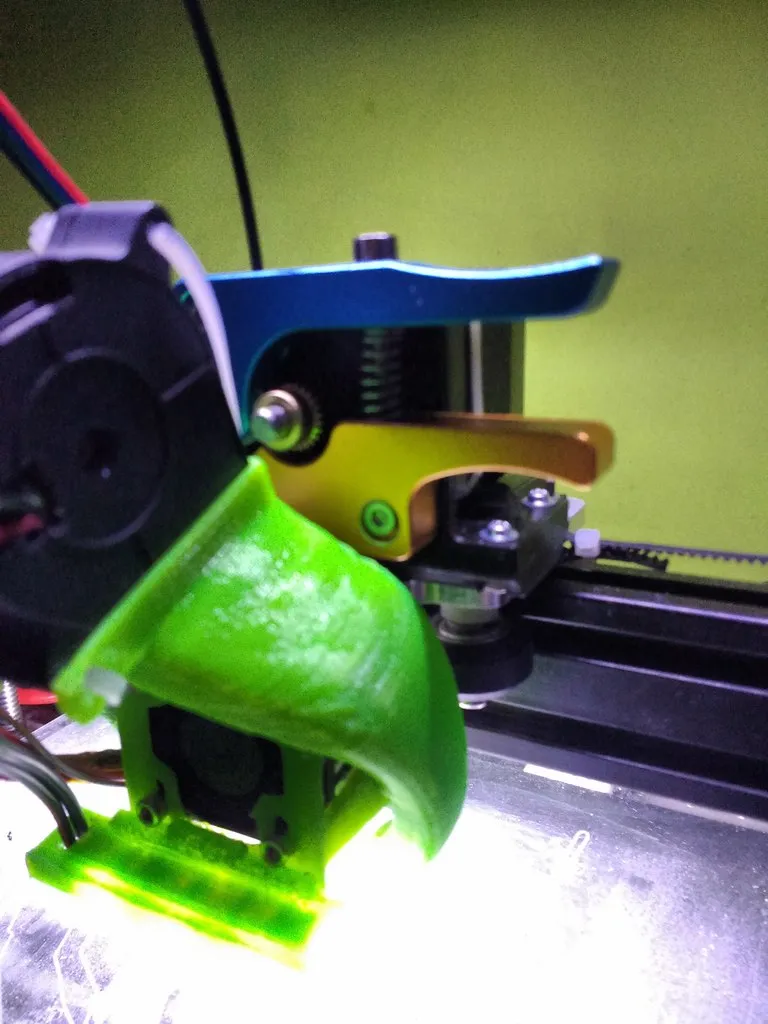
X-axis Rail and Bearings

The X-axis rail provides a stable track for the bed carriage to move. Linear bearings, often LM8UU bearings, allow for smooth, friction-free movement along this rail. Ensuring the rail is straight and the bearings are in good condition is critical for preventing bed wobble and ensuring accurate printing. Regular maintenance, such as cleaning and lubrication of the bearings, can significantly extend their lifespan and maintain print quality. A worn or damaged X-axis rail or faulty bearings will lead to inconsistent layer adhesion and print failures. The bearings may need to be replaced or properly greased to reduce friction and enhance the accuracy of the bed movement.
Heated Bed Mounting
The heated bed is mounted directly onto the bed carriage, providing the surface for your prints. This component is responsible for maintaining the correct temperature for the print bed. The heated bed ensures that the first layer of your print adheres correctly and minimizes warping during the printing process. Mounting typically involves screws and potentially some vibration damping pads. Correctly mounting the heated bed is crucial for consistent print quality. Ensure the bed is firmly secured and the wiring is properly connected, following all safety guidelines. Using a stable mounting system ensures your prints won’t shift or detach during the printing process, which can lead to failures.
Y-axis Movement System
The Y-axis movement system controls the back-and-forth motion of the bed carriage. Typically, this consists of a stepper motor, a belt and pulleys system, and often end-stop switches. This system coordinates the bed’s motion, allowing the print head to lay down the necessary material, layer by layer. Accurate Y-axis movement is crucial for maintaining print dimensions and overall print quality. Regular checks of the belt tension and the alignment of the pulleys are important to prevent issues. The Y-axis system requires smooth movement and the right tension to work, and any issues with the belt tension, the stepper motor, or the endstop switches can cause issues.
Bed Carriage Assembly

Assembling the Tevo Tarantula bed carriage can seem daunting, but it is manageable by following instructions closely. It’s advisable to have a clear workspace, good lighting, and the appropriate tools on hand. The general process involves attaching the heated bed to the carriage frame and connecting it to the Y-axis movement system. Take the time to ensure all screws are securely fastened but not over-tightened, as this could damage components. Double-check all connections before powering on your printer. A well-assembled bed carriage ensures a stable printing platform.
Step-by-Step Guide
The assembly process often begins with the preparation of components. Gather all necessary parts, including the heated bed, carriage frame, linear bearings, and screws. Next, mount the heated bed to the carriage frame, ensuring a secure fit. After that, attach the carriage to the Y-axis system, which involves belts, pulleys, and the stepper motor. Finally, before using the printer, ensure that every wire is connected safely and correctly. It is recommended to consult the official Tevo Tarantula manual or a video tutorial during this step to ensure all parts are assembled correctly, especially if this is your first time assembling a 3D printer.
Prepare the Components
Start by unpacking all components and sorting them. Ensure all parts are present and in good condition. Identify the heated bed, the bed carriage frame, linear bearings, screws, and the Y-axis belt and pulleys. This initial step ensures that you have everything required for a smooth assembly process. Inspect the components for any signs of damage or wear, and consult the parts list in the manual to ensure that you have all necessary parts. Taking time to prepare all of the components helps you to better visualize the overall assembly process and ensures a more organized and streamlined approach.
Mounting the Heated Bed

Carefully align the heated bed with the bed carriage frame. Use screws to secure the heated bed to the frame, ensuring it is firmly attached. It is essential to tighten the screws appropriately; they should be tight enough to hold the bed securely, but not so tight that they damage the bed or the frame. Using the appropriate mounting hardware that is included in the kit will ensure that the bed is mounted flush to the carriage frame and will not move during the printing process. This step is crucial to providing a stable printing surface.
Attaching the Bed to the Y-axis
Once the heated bed is securely mounted on the carriage, attach the carriage to the Y-axis movement system. This usually involves attaching the carriage to the Y-axis rods, rails, and ensuring the belt is correctly routed through the pulleys. Make sure the belt tension is correct – not too loose and not too tight – to ensure smooth motion without binding. The proper connection between the bed carriage and the Y-axis system ensures that the bed moves accurately back and forth, enabling the 3D printer to create detailed and accurate prints. Check for smooth movement and proper alignment to ensure the bed carriage moves freely and without any resistance.
Connecting the Bed Carriage to the Frame
The final step is to connect the entire bed carriage assembly to the printer frame. This usually involves securing the carriage to the Y-axis rods, aligning the movement system, and ensuring all components are correctly seated and secured. Make sure to double-check all connections and fasteners to avoid any loose parts, and that all screws are properly tightened. The correct positioning of the bed carriage within the frame ensures that the printer functions correctly and the bed moves smoothly. This also ensures the bed is properly aligned with the print head, which is essential for accurate printing.
Bed Carriage Calibration

Calibration is essential to ensure the bed carriage is functioning correctly and that prints adhere properly. This involves leveling the bed, adjusting the Z-axis endstop, and verifying the first layer. Proper calibration ensures the nozzle is the correct distance from the bed, critical for successful printing. Performing calibration regularly will help you troubleshoot any printing issues and ensure consistent results. This practice guarantees that your prints stick to the build plate and that the first layer is applied correctly. It is a fundamental part of operating a 3D printer.
Leveling the Bed
Leveling the bed ensures that the printing surface is perfectly parallel to the nozzle, providing a consistent first layer and print adhesion. Most Tevo Tarantula models use a manual leveling system. You typically adjust the bed height using adjustment knobs at each corner. Use a leveling tool, like a piece of paper or a feeler gauge, to ensure the nozzle has the proper distance from the bed in each corner. Leveling should be done before each print or any time you adjust the bed or nozzle. The goal is to have the nozzle perfectly positioned to lay down the first layer of filament.
Adjusting Z-axis Endstop
The Z-axis endstop determines the zero point, the height at which the nozzle starts printing. The endstop switch is typically located near the bed or the print head. Adjust the endstop so that the nozzle is the correct distance from the bed when it triggers the switch. You will generally perform this by adjusting the endstop’s position relative to the printer frame. This is often the final step in bed leveling and is critical for ensuring that the first layer of your print adheres properly. Incorrect adjustment can result in prints that either do not stick to the bed or cause the nozzle to drag across the surface, leading to damage and print failure.
Troubleshooting Common Issues

Even with careful assembly and calibration, you may encounter issues with the bed carriage. Common problems include bed wobbling, uneven heating, and no movement on the Y-axis. Most of these issues can be resolved with some troubleshooting and adjustments. Understanding the underlying cause will enable you to implement effective solutions and get your Tevo Tarantula back up and running. If you encounter any of these problems, don’t panic; follow this guide to help you find a solution, and return to printing your 3D models.
Bed Wobbling
Bed wobbling is usually caused by loose connections or worn bearings. Check all screws, especially those securing the bed to the carriage and the carriage to the Y-axis rods. Tighten any loose screws. Inspect the linear bearings for wear and tear. If the bearings are worn, they should be replaced. You can also clean and lubricate the bearings. Ensuring all screws are properly tightened and the bearings are in good condition will reduce or eliminate any wobble. Inspect the X-axis rod and linear bearings, and the Y-axis belt tension, which will help prevent vibrations that might affect the quality of your prints.
Uneven Heating
Uneven heating can lead to warping and poor print adhesion. Check the connections to the heated bed, ensuring they are secure. Use a multimeter to check the resistance of the heating element. Ensure that the bed is level. Check the power supply is working. A faulty heating element or inadequate power can cause uneven heating. If the bed is not heating evenly, your prints are likely to warp or detach. Inspect and make sure the power supply provides the correct voltage, and consult a professional if problems persist.
No Movement on the Y-axis

If the bed does not move on the Y-axis, check the belt tension and the stepper motor connection. Make sure that the belt is securely attached to the pulleys and that the stepper motor is properly wired. The Y-axis endstop may also be triggered, preventing movement; adjust the endstop if necessary. Additionally, check the motor driver on the mainboard. If the Y-axis motor is not functioning, and you’ve eliminated other possibilities, the issue might be a faulty motor driver or the stepper motor itself, which will need to be replaced. Make sure all the connections are correct, and that the stepper motor is receiving the correct power to move the bed.
Tips for Beginners
Start with the basics. Take your time during assembly and calibration. Consult online resources, such as forums and videos. Always start with simple prints and gradually increase the complexity. Understand the key principles of 3D printing and how each component of the printer functions. Make sure the bed is level and at the correct height to reduce printing failures. Keep a maintenance schedule for your printer. Clean and lubricate parts regularly. Proper maintenance ensures the longevity and consistent performance of your 3D printer. The better you understand the mechanics of the Tevo Tarantula bed carriage, the better prints you will create.