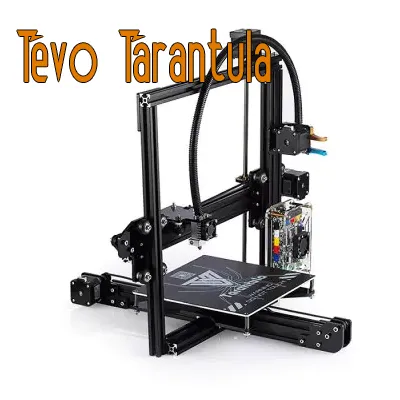
Understanding Tevo Tarantula Specs
The Tevo Tarantula is a popular DIY 3D printer, known for its affordability and expandability. Understanding the Tevo Tarantula specs is crucial for both beginners and experienced users. This guide will break down the key specifications, helping you to understand the capabilities and limitations of your Tevo Tarantula and providing a solid foundation for successful 3D printing. By understanding the core components and their specifications, you can make informed decisions about materials, settings, and potential upgrades, ultimately improving your print quality and overall experience. Delving into the details of your printer will also help you troubleshoot any issues that may arise, ensuring you can keep printing smoothly.
Print Bed Specs
The print bed is a critical component as it directly impacts the size and quality of your prints. The specifications of the print bed influence the types of projects you can undertake and the level of detail you can achieve. Understanding the print bed characteristics is the initial step in evaluating the printer’s capabilities.
Print Bed Size

The Tevo Tarantula typically offers a build volume of 200mm x 200mm x 200mm. This size allows for a variety of prints, from small detailed models to larger functional parts. Consider the size requirements of your projects when evaluating this aspect of the specs. If you mostly print small items, this may be adequate, whereas larger projects may need a printer with a bigger bed.
Print Bed Material
The original Tevo Tarantula came with a heated bed, usually covered with a surface like blue painter’s tape or a build surface. These surfaces provide adhesion for the first layer. Upgrading to a glass bed with adhesive or a PEI sheet is a common modification for improved adhesion and print quality. The heated bed ensures that the initial layers adhere properly, preventing warping. Upgrading or replacing the original bed can greatly enhance your print results.
Extruder Specs
The extruder is responsible for melting and extruding the filament onto the print bed. The extruder’s performance has a significant impact on print quality, particularly in terms of precision and layer adhesion. A reliable extruder and understanding of its capabilities are crucial to success.
Extruder Type
The Tevo Tarantula commonly uses a Bowden-style extruder, where the extruder motor is mounted on the frame, and the filament is fed through a PTFE tube to the hot end. This setup reduces the weight on the print head, potentially leading to faster print speeds and less vibration. This is different from a direct drive extruder, where the extruder is mounted directly above the hot end. The Bowden setup is a key aspect of the Tevo Tarantula specs.
Nozzle Size
The default nozzle size on the Tevo Tarantula is typically 0.4mm. This size is a good balance between detail and print speed. You can change the nozzle to different sizes, such as 0.2mm for finer details or 0.6mm or larger for faster prints. Nozzle size directly affects the resolution and the speed of the print. Experimenting with nozzle sizes is part of the learning curve and can improve printing results.
Filament Compatibility
The ability to use a variety of filaments is one of the strengths of this printer, allowing for a wide range of projects. Understanding the filament diameter and the supported types is essential for choosing the right materials and achieving desired print results. Improper selection will lead to print failure and frustration. Therefore, carefully considering your filament options is crucial.
Filament Diameter

The Tevo Tarantula is designed to use 1.75mm filament. This is a standard diameter for many 3D printers, providing a wide selection of materials. Make sure you are using the correct diameter to avoid extrusion problems. Using the wrong diameter will cause jams and print failures.
Supported Filament Types
The Tevo Tarantula can print a variety of filaments, including PLA, ABS, PETG, and some flexible filaments. PLA is a popular choice for beginners due to its ease of use and low warping. ABS requires a heated bed and a more controlled environment. PETG offers a balance of strength and ease of printing. Always check the filament’s recommended print settings and adjust accordingly.
Electronics and Firmware Specs
The electronics and firmware of the Tevo Tarantula control all aspects of the 3D printing process. The motherboard, firmware, and connectivity options determine how the printer functions, communicates, and can be customized. Understanding these specifications is vital for successful operation, troubleshooting, and potential upgrades.
Motherboard

The original Tevo Tarantula often used a Melzi board. This board handles all the necessary operations for the printer to function. This includes controlling the stepper motors, heating the bed and nozzle, and communicating with the user interface. Upgrades to more advanced boards are a common modification to improve printing performance and add features. These can be used for more advanced control and improved print quality.
Firmware
The Tevo Tarantula typically uses Marlin firmware. Marlin is open-source firmware that controls the printer’s functions. It can be customized to suit the user’s needs. Updating or modifying the firmware is a great way to enhance your printer. Understanding how to work with and update the firmware will help you with the printer and will lead to more advanced printing options.
Connectivity
Connectivity options dictate how you can interact with the printer and transfer files. Understanding these options can simplify your workflow. The standard options allow for easy file transfers and remote monitoring.
SD Card Support

The Tevo Tarantula comes with an SD card slot, allowing you to load G-code files directly onto the printer. This is the simplest method. Once the G-code is loaded, you can print without a direct connection to a computer. This gives more freedom and flexibility while printing.
USB Connection
The printer can also connect to a computer via USB. This allows you to monitor the print and send commands. Using software like Pronterface or Repetier-Host allows you to control the printer directly. This is useful for real-time adjustments or monitoring.
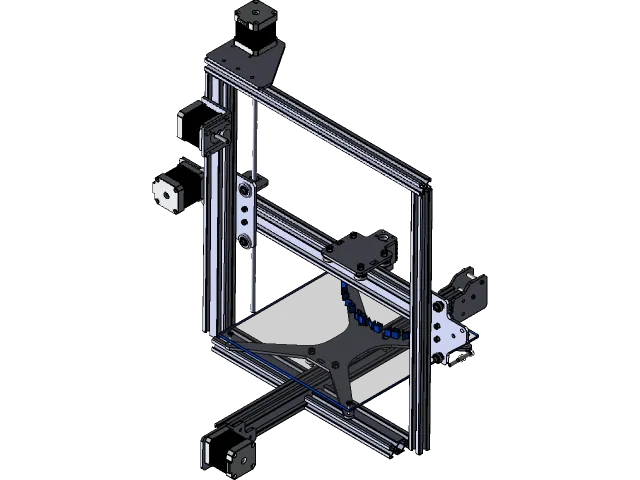
Mechanical Specs
The mechanical aspects of the Tevo Tarantula define the physical structure and dimensions of the printer. These specifications influence the printer’s stability, build volume, and overall performance. Getting to know this part of the printer will help you with print quality and any potential issues.
Frame Material

The Tevo Tarantula typically has a frame made of aluminum extrusions. This material provides a good balance of rigidity and weight. The aluminum extrusions allow for easy assembly and modification. It is essential to ensure that the frame is properly assembled and tightened for optimal performance. A stable frame minimizes vibrations during printing, leading to better print quality.
Build Volume
As mentioned earlier, the standard build volume of the Tevo Tarantula is 200mm x 200mm x 200mm. It provides enough room to make many objects but may be limited when printing larger parts. Knowing the build volume will dictate the size of the objects you can create, so understanding this measurement is crucial.
Assembly and Setup
Assembling and setting up your Tevo Tarantula is the first step. Proper assembly is crucial for successful printing. The included instructions, though sometimes needing improvement, will help with the process. Take your time, double-check connections, and follow the steps. Properly assembling the printer will result in better prints and reduce the chances of errors.
Unboxing and Initial Inspection
When you first receive your Tevo Tarantula, carefully unbox all the components and check for any damage during shipping. Make sure all the parts listed in the manual are present. Report any missing or damaged parts to the supplier. This step is to ensure all is in working order from the start.
Tools and Parts Checklist
The Tevo Tarantula comes with the necessary tools. It’s helpful to have additional tools on hand, such as a set of Allen wrenches, a digital caliper for accurate measurements, and a multimeter for electrical checks. Make a list to make sure you are not missing anything before starting the assembly.
Step-by-Step Assembly Guide
Follow the assembly instructions. The process typically involves attaching the frame components, installing the bed, and wiring the electronics. Refer to online guides, videos, and forums for additional assistance. Make sure all connections are secure. Properly assembling all the parts will save you time and trouble later on. Check for any misalignments.
Firmware Flashing
Flashing the firmware is often necessary. Download the latest version of Marlin firmware, configure it for your printer, and upload it to the control board. This will ensure optimal performance. This step is a little more complex, so make sure to follow the instructions closely.
Bed Leveling and Calibration
Proper bed leveling is critical for good first-layer adhesion. Manually level the bed, and then use the auto-leveling feature. Calibrate the printer by adjusting the steps per mm. This ensures the printer moves the correct distances. Accurate bed leveling and calibration are important for the first layer, which will influence the whole printing.
Software and Printing
Choosing the right software and understanding printing settings is essential for getting the best results. Setting up the software and configuring settings will prepare you to begin 3D printing. The printing process relies on these tools to turn digital designs into physical objects. Correct configuration of your printing tools leads to successful prints.
Recommended Slicing Software
Slicing software converts your 3D models into G-code. Cura and PrusaSlicer are popular, open-source options. Simplify3D is a paid option that offers more advanced features. These tools allow you to prepare your models for the printing process. Selecting and understanding your slicing software will significantly affect your printing outcomes.
Slicing Settings
Slicing settings control various aspects of the print, such as layer height, print speed, infill density, and support structures. Experiment with different settings to find the optimal combination for your specific filament and model. The ideal settings depend on the filament, so experimenting is key to achieving good results. Always start with a simple model to test.
Initial Print Setup and Calibration
Before you start printing complex models, print a test object, like a calibration cube. This lets you check for dimensional accuracy and identify potential issues. Fine-tune settings based on the results. Print calibration tests and adjust the settings. This will allow you to test and fix any potential printing issues.
Troubleshooting Common Issues
Even with a well-configured printer, problems can occur. Learning to troubleshoot common issues will save you time and frustration. Each issue has specific causes and solutions. This will make the whole printing experience less problematic. Identifying and fixing the problem will give you more satisfaction.
Nozzle Clogging
Nozzle clogging is a common issue. It can happen when the filament isn’t melting properly. It also occurs when the nozzle is too close to the bed. Clean the nozzle by heating it up and using a needle or a special cleaning tool. Make sure the hot end temperature is correct for the filament. Using a nozzle cleaning tool or increasing the temperature helps prevent blockages. Always ensure the hot end has reached the target temperature.
Bed Adhesion Problems
Poor bed adhesion can lead to warping and print failures. Clean the print bed with isopropyl alcohol. Use a glue stick or hairspray to improve adhesion. Ensure the bed is properly leveled. Make sure the first layer is being extruded correctly. Ensure the bed is at the proper temperature. If the model doesn’t stick properly to the bed, the whole print can get messed up.
Filament Feeding Issues
Filament feeding issues can result in under-extrusion. This results in gaps in the print. Check the extruder gear for clogs or wear. Adjust the extruder tension. Ensure the filament is feeding smoothly from the spool. Make sure the filament is not tangled. Check for any obstructions along the filament path. Ensure the extruder gear grips the filament firmly and consistently. Carefully look for these issues to troubleshoot the problem.